Canadian Cowboy Caviar

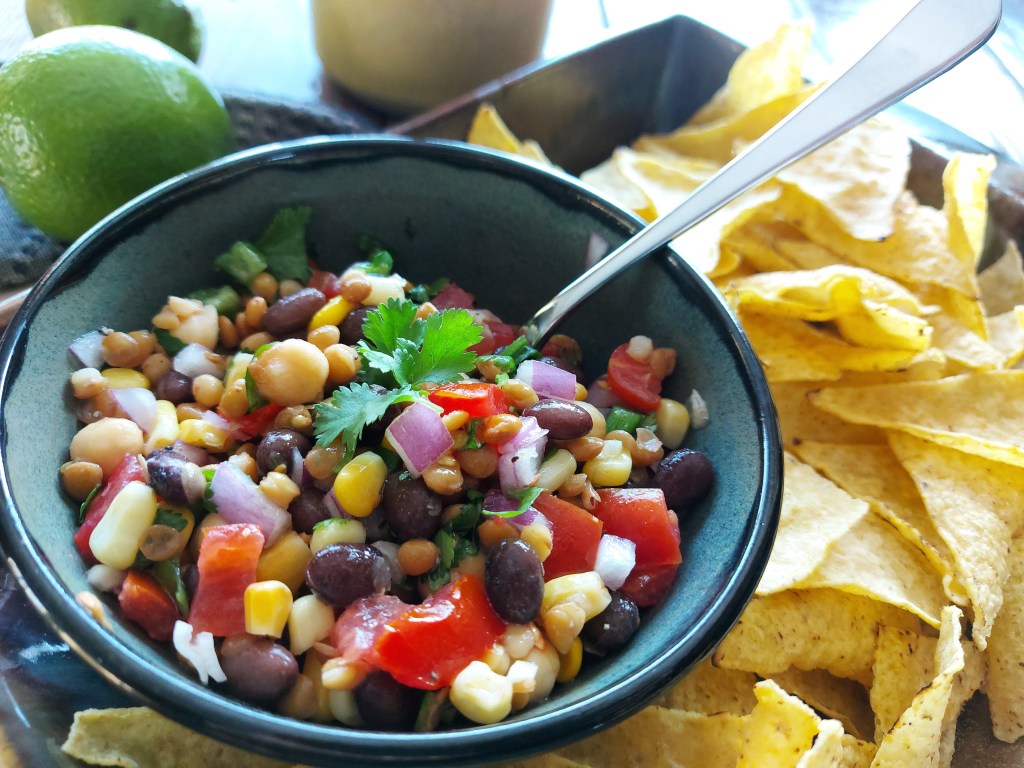
What the heck is Cowboy Caviar? I’d never heard of it before stopping for take-out from one of our favourite restaurants, Farmhouse 50 in Minnedosa, Manitoba.

I was picking up their fabulous pizza and wings special when I spied “Cowboy Caviar” in their Grab ‘n Go section. Intrigued, I thought, “Why not? Let’s give it a try!” This innocent looking bean-veggie-salsa-combo was AMAZING and devoured by our family in no time flat.

And then, I couldn’t stop thinking about it! But, with the restaurant an hour and a half away, it wasn’t possible to just pop back for more. So the next day, I started experimenting. Once I came up with a combination of ingredients and a dressing that was a hit with the family, I asked a few friends to recipe test for me. The reviews were great with one suggestion to add the zest from the lime. Genius! Thank you Ellen Pruden!

With a little research I found out Cowboy Caviar, originally named Texas Caviar, was created in the 1940s by Helen Corbitt, an accomplished and formidable Home Economist, teacher, chef and cookbook author. She made the dish, after a request to serve a dinner with Texas-only products, using black-eyed peas, garlic, onion, vinegar and oil. When you search ‘cowboy caviar’ today, there are over 3,000,000 results. Reading about Ms. Corbitt, I’m not sure how she would feel about the evolution and popularity of her creation.

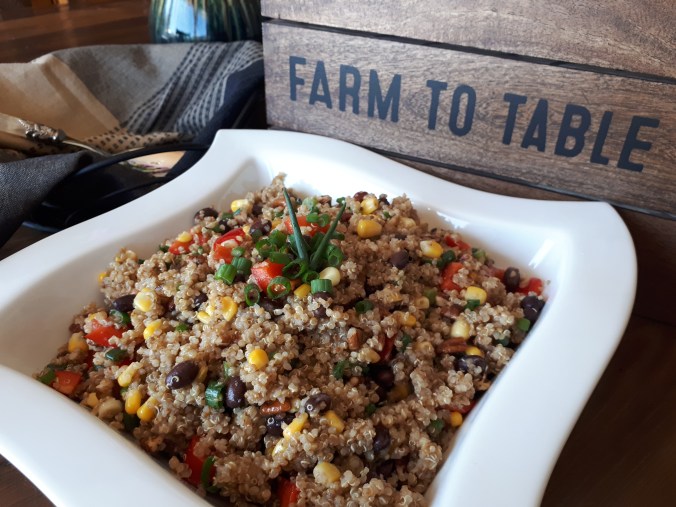
You’ll find no black-eyed peas in this recipe. It uses Canadian-grown pulses — lentils, black beans and chickpeas, and of course, Canadian canola oil.

Feel free to put your own spin on this recipe. Don’t like chickpeas? Replace the amount with more lentils or black beans. Hate cilantro? Use parsley. Not sure about the garlic? Try it without. Don’t have fresh tomatoes? Drain and chop canned tomatoes.

Just so you know this recipe makes 12 cups. Yes, it seems like a lot, but it’s addictive. And versatile. And delicious.

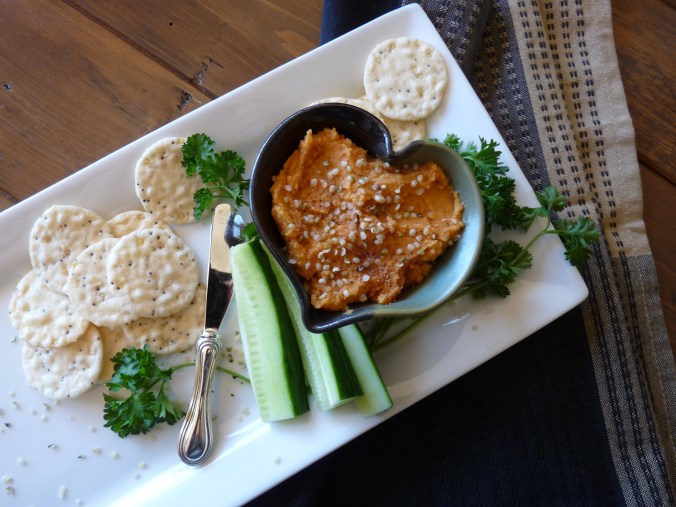
I love it as a salsa with tortilla chips, but it’s also fabulous on its own a side salad, or a snack to avert becoming hangry. Toss it with greens or pasta. Use it in omelettes or quesadillas. Get creative!

And if you really can’t see yourself using 12 cups, share away! Who wouldn’t want a surprise delivery of this tasty, satisfying snack with a bag of tortilla chips delivered to their door?

Canadian Cowboy Caviar

Main Ingredients:

  • 1 — 540 ml (19 oz) can black beans, drained and rinsed
  • 1 — 540 ml (19 oz) can chickpeas, drained and rinsed
  • 1 — 540 ml (19 oz) can lentils, drained and rinsed
  • 2 cups sweet corn, frozen & thawed, or canned
  • 2 medium tomatoes, finely chopped (about 2 cups)
  • 1 medium red onion, finely chopped (about 1 ½ cups)
  • 1 – 2 jalapeno peppers, finely chopped or ¼ cup finely chopped bell peppers (any colour)
  • 1 – 2 cloves garlic, finely chopped
  • 1 cup cilantro or parsley, finely chopped

Dressing:

  • 1/3 cup canola oil
  • 3 tbsp lime juice (1 — 2 limes)
  • zest from lime(s)
  • 3 tbsp apple cider vinegar
  • 1 tbsp white sugar
  • ½ tsp salt
  • ½ tsp pepper

Directions:

*Chop garlic and set aside.

Drain and rinse black beans, chickpeas and lentils. Put in large bowl. Add corn. Chop tomatoes, red onion, peppers and cilantro. Toss all ingredients together, including garlic.

In a small bowl, whisk together dressing. Pour over top of ingredients, and mix.

Makes 12 cups. Serve immediately or store covered in the fridge.

Serving Options:

  • Appetizer with tortilla chips
  • Side Dish
  • Salad topping on your choice of greens
  • Omelette filling
  • Quesadilla filling
  • Perfect with pasta, hot or cold

*Pro-tip for garlic from Professional Home Economist Mairlyn Smith – “For its antioxidants to become more bio-available, garlic needs to oxidize before it is added to a recipe. By letting it sit there “breathing” the oxidation can take place.”

Maple Quinoa Salad

With spring’s arrival the desire for quick and easy make-ahead meals increases. This whole-grain quinoa salad fits the bill, plus it incorporates one of my favourite flavours — maple! 

I use locally grown “Prairie Quinoa” along with Manitoba maple syrup produced in our area.  An excellent salad to add to your meal-prep repertoire!  

Maple Quinoa Salad

Main Ingredients:

  • 1 cup quinoa
  • 2 cups water
  • 1 tbsp maple syrup
  • 1 red pepper, diced
  • 6 -8 green onions, chopped
  • 1 cup kernel corn (frozen or canned)
  • 1 cup canned black beans, rinsed and drained
  • 1/2 cup pecans, walnuts or almonds, chopped

Vinaigrette:

  • 1/4 cup apple cider vinegar
  • 3 tbsp canola oil
  • 2 tbsp pure maple syrup

Directions:

Place water, quinoa and 1 tbsp maple syrup in medium saucepan and bring to a boil.  Stir, cover pot, reduce heat and simmer for 15—20 minutes until cooked through.  Remove the saucepan from heat, fluff quinoa with a fork and let sit 5 —10 minutes.  Cool completely and transfer to a serving bowl.

While quinoa is cooling prepare peppers, green onions, corn, black beans and nuts.  Whisk together apple cider vinegar, canola oil and maple syrup.

Add veggies, beans, nuts and vinaigrette to cooled quinoa. Toss well and refrigerate until ready to serve.

Roasted Sweet Potato & Garlic Hummus

I’ll admit, the first time I tried hummus I wasn’t impressed.  It very dry, over-powered with garlic and rather unpalatable — not a recipe I felt obliged to try! But after sampling a few store bought varieties  — roasted red pepper, caramelized onion — I thought maybe hummus wasn’t so bad after all.  Then I found a recipe for Sweet Potato Hummus at Alaska from Scratch  which converted me to the ‘pulse side’ of snacking!  I adapted it to use heart-healthy canola oil and incorporated a few great tips from a Roasted Butternut Squash Hummus recipe at Nita at Carrots & Cake. The result — a family favourite, kid-approved, delicious, addictive, smooth and creamy hummus! 

Roasted Sweet Potato & Garlic Hummus

Main Ingredients:

  • 1 medium sweet potato (approx 1 lb or 500 grams), drizzle of canola oil
  • 1 – 19 oz (540 ml) can chickpeas, drained & rinsed
  • 3 cloves *roasted garlic or 1 raw garlic clove
  • 1/2 cup canola oil
  • 1 lemon, juiced (about 3 tbsp)
  • 1/4 cup hemp hearts (optional)

Spice Mixture:

  • 1 tsp paprika
  • 1 tsp cumin
  • 1/4 tsp cinnamon
  • 1/8 tsp cayenne pepper
  • pinch of nutmeg

Garnish options:

  • Parsley
  • Green onions
  • Hemp hearts
  • Roasted chickpeas
  • Grated or ground nutmeg
  • Paprika
  • Cayenne Pepper
  • Cinnamon
  • Lemon rind

Directions:

  1. Preheat oven to 400 F.
  2. Scrub the sweet potato & dry thoroughly. Pierce the skin 2-3 times with a knife or fork and lightly coat with a drizzle of canola oil.
  3. Place on baking sheet lined with parchment paper. Bake 45 min — 1 hour, until tender.  (If you cut sweet potato in half, reduce time to ~ 30 minutes)
  4. Let cool, peel off skin, cut off any dark spots and cut into 4 —5 cm pieces.
  5. *If roasting garlic, toss cloves with a bit of canola oil, wrap in foil & place on baking sheet with the sweet potato. Garlic will take less time to roast so remove from oven after about 30 minutes.
  6. Drain & thoroughly rinse chickpeas.
  7. Toss chickpeas, sweet potato, garlic, canola oil, lemon juice, hemp hearts (if desired) & spice mixture into blender or food processor
  8. . Blend well, scraping down as needed. If it isn’t as smooth & creamy as you’d like, add more canola oil (or water), a tablespoon at a time, until it reaches desired consistency.

To serve, drizzle with canola oil and top with your choice of garnishes. Serve with crackers & raw veggies. This also makes a wonderful spread for sandwiches or wraps. Basically this hummus is so good, you will get very creative in finding ways to use it, other than just eating it ‘straight-up’ with a spoon — which, by the way, is totally acceptable!

Notes:

  • Roasted garlic is sweeter & less overpowering than raw garlic, hence only use 1 clove if opting for raw.  My family loves it either way!
  • Hemp hearts will add a nutty flavour & slightly change the consistency of the hummus, but they also add protein, fibre & healthy fats.
  • Encourage creativity in the kitchen by letting the kids help. They love to personalize their snack by choosing their own garnishes, crackers & veggies.

Storage:

Store in an airtight container in the refrigerator for 3 -5 days, if it lasts that long…

Pumpkin Oatmeal Muffins

If you are looking for a hearty, healthy, flavourful, pumpkin muffin recipe — this is it!  Perfect for breakfast, snacks and dessert too! These muffins are family favourite and always a welcome addition to university care packages.

 Adapted from a recipe found on food.com several years ago. 

Pumpkin Oatmeal Muffins

2016-10-14-13-18-00

Ingredients:

  • 1/3 cup canola oil
  • 1/2 cup sugar
  • 2 eggs, beaten
  • 1 – 398 ml can of pumpkin puree (1 2/3 cup)
  • 1/3 cup milk
  • 3/4 cup all-purpose flour
  • 1/2 cup whole barley flour or whole wheat flour
  • 1 cup quick-cooking oats
  • 1 tsp baking powder
  • 1/2 tsp baking soda
  • 1/2 tsp salt
  • 1 tsp cinnamon
  • 1/2 tsp nutmeg
  • 1/4 tsp ginger
  • 1/3  cup mini-chocolate chips

Directions:

  1.   Pre-heat oven to 375°F (190ºC)
  2.   Grease or line a 12-cup muffin tin with large parchment baking cups.
  3.   Whisk together canola oil, sugar and eggs.
  4.    Fold in pumpkin puree and milk; mix thoroughly.
  5.   In separate large bowl, combine flours, oats, baking powder, baking soda,     salt, spices and mini-chocolate chips. 
  6.   Pour wet ingredients into dry ingredients, stir just to combine.
  7.   Using an ice cream scoop or large spoon, scoop the mixture evenly into    the muffin liners.
  8.   Bake for 20 – 25 minutes, until toothpick or cake tester inserted into the     center of a muffin comes out clean.
  9.   Set tins on cooling rack for 5 min. before removing muffins to cool    completely.

Notes:

  • Be sure to use pure pumpkin puree, not canned pumpkin pie.
  • Check out the amazing health benefits of barley flour here.
  • Don’t have any  barley or whole wheat flour? Substitute with all-purpose flour.
  • Feel free to switch out the mini-chocolate chips with raisins or nuts.

Storage:

Can be stored in a covered container for 2 to 3 days or frozen for up to 3 months. If the kids are home or company drops by, you likely won’t have to worry about that though…

Hearty Harvest Meals

These meal ideas are fabulous — no matter where your ‘kitchen table’ is at this busy time of year.  Originally published on the Canola Eat Well blog on August 24, 2015.

Harvest is now underway, but for many of us at a snails pace as high humidity and frequent rainfalls persist.  Last night in our area, it was unusually quiet after another 21 mm of rain fell — the chirping of crickets the only sound in the evening air. Here’s hoping for a good, long stretch of warm, dry days ahead so combining can resume. 


IMG_20160821_233418For many the end of summer brings a twinge of sadness. Not so for farmers. Usually it’s an exhilarating time filled with excitement, gratitude and relief. Another growing season is behind us and it’s finally time to reap the rewards.

The hum of combines is music to our ears. Country roads are bustling as trucks roll up and down hauling crop from fields to bins. Eyes are always to the sky as we hope for ideal harvest conditions. This is our final ‘dance’ with Mother Nature for the year and we hope it’s a smooth one.

The days can be long and hectic, so keeping the harvest crew fueled with healthy, nutritious meals is key. Thankfully, fresh local produce is abundant whether it be from your garden, the farmers’ market, a roadside stand or the grocery store.

Simple recipes packed with vegetables, which can be prepared ahead of time, are perfect for harvest. Convenience is key – whether taking meals to the field or looking for something which warms up easily if your crew prefers to keep working until weather conditions shut them down.

Apple-Galette-2_WEB

Apple Galette – Photo Courtesy of MB Canola Growers

Beef Braised and Vegetable Stew fits the bill perfectly, using onions, carrots and rutabagas. Stew gives you the versatility to change up the vegetables if you wish. Corn-on-the-cob is a quick, easy side and Cheddar Baking Powder Biscuits are ideal to mop up your plate. Pie is always appreciated for dessert but is something this cook has never mastered. This simple, no-fail, fuss-free Apple Galette is every bit as good!

Spice-It-Up-Paste-for-Chicken-Legs

Spice It Up Paste for Chicken Legs – Photo Courtesy of MB Canola Growers

On those really hot days your may prefer more picnic-like fare. Pasta salads are always a hit and an easy way to add more veggies to a meal. Put your own twist on Angel Wings Pasta. It pairs perfectly with chicken pieces seasoned with Spice-It-Up Paste.  If you have an abundance of greens to use, Roasted Beet Salad is fabulous.


Jenns-Chewy-Granola-Bars

Jenn’s Chewy Granola Bars – Photo Courtesy of MB Canola Growers

‘Grab and go’ desserts are convenient and can do double duty for lunch boxes and snacks. Have a bumper crop of zucchini or a neighbour dropping it off on your doorstep?  Eggless Double-Chocolate Zucchini Cake or Zucchini Chocolate Chip Muffins make a perfect finish with fresh fruit. Jenn’s Chewy Granola Bars are another great option and handy to have on stock in the freezer.

No matter the meal-time choices, this time of year your efforts are always appreciated. Taking a break is good for mind and body, it enhances farm safety and gives you time to connect with your family and friends. Everyone is always happy to sit down to a hearty meal.

I sometimes think back to the days of wood stoves, no refrigeration and large threshing gangs that needed to be fed three times a day. I admire the hard-working women who labored from dawn to dusk to get the job done. It makes me grateful for modern conveniences, the ease in which a meal can be prepared and many choices we now have.

Wishing you well as you transition your ‘farm table’ from the kitchen to the field.  May you have a safe and bountiful harvest!

Eggless Double-Chocolate Zucchini Cake

Short on eggs and long on zucchini? This cake is for you! It’s that time of year when either your garden, or your neighbour’s,  is overflowing with this popular, prolific squash.  My family loves this moist, delicious, easy-to-make cake.  After all, who doesn’t like turning a vegetable into chocolate? Sounds like a super-power to me! 

Eggless Double-Chocolate Zucchini Cake

2016-08-05 14.34.44

Ingredients:

  • 1/3 cup canola oil
  • 1 1/2 cups sugar
  • 3/4 cup buttermilk *
  • 2 cups grated zucchini
  • 1 tsp vanilla
  • 2 1/2 cups flour
  • 4 tbsp natural cocoa powder
  • 1 tsp baking soda
  • 1/2 tsp baking powder
  • 1/2 tsp cinnamon
  • 1/2 cup dark chocolate chips

Directions:

  1.    Preheat oven to 350°F (180°C).
  2.    Grease 9 X 13 pan or line with parchment paper.
  3.    In large bowl, mix canola oil and sugar.
  4.    Add milk, grated zucchini and vanilla. Stir well.
  5.    In separate bowl, combine dry ingredients and chocolate chips.
  6.    Add to zucchini mixture.  Batter will be thick.
  7.    Spread evenly in pan. Bake 25 – 35 minutes, until toothpick or cake tester inserted in the middle comes out clean.
  8.   Let cool completely before serving.

Storage:

Can be kept in a covered container for 2 to 3 days or frozen for up to 3 months.

Notes:

*Buttermilk substitute – add 1 tbsp vinegar to milk (at least 1% milk fat).

Want to preserve excess squash for later use? Simply measure out desired amount of grated zucchini (2 cups for this recipe), pack in freezer bags, date and label. Keep in the freezer for up to 6 months.


Three-Grain, Berry-Amazing Muffins

When strawberry and saskatoon season collide, your favourite muffins get a make-over! 

Three-Grain, Berry-Amazing Muffins

Muffins & Berries

Ingredients:

  • 1 cup quick-cooking oats
  • 1/2 cup barley flour
  • 1/2 cup whole wheat flour
  • 1 tsp baking powder
  • 1/2 tsp baking soda
  • 1/2 tsp salt
  • 1/2 tsp cinnamon
  • 1 large egg
  • 1 cup yogurt, plain
  • 3/4 cup brown sugar, packed
  • 1/3 cup canola oil
  • 1 tbsp finely grated lemon rind
  • 1/2 cup strawberries, diced
  • 1/2 cup Saskatoon berries 
  • 1 tbsp flour

Directions:

  1.   Pre-heat oven to 375°F (190ºC)
  2.   Lightly grease or line a 12-cup muffin tin with large paper liners.
  3.   Thoroughly mix oats, flours, baking soda, baking powder, salt and                      cinnamon in a large bowl.
  4.   In separate bowl, whisk together egg, yogurt, brown sugar, canola oil and     lemon rind.
  5.   In small bowl, coat berries evenly with flour.
  6.   Pour wet ingredients into dry ingredients, stir just to combine. Gently  fold in berries.
  7.   Using an ice cream scoop or large spoon, scoop the mixture evenly into    the muffin liners.
  8.   Sprinkle tops with oat or barley flakes.
  9.   Bake for 20 – 25 minutes, until toothpick or cake tester inserted into the     center of a muffin comes out clean. Muffins should be golden brown.
  10.   Set tins on cooling rack for 5 min. before removing muffins to cool        completely. Although, you may want to sample one while slightly warm…

Notes:

I love barley flour and have been substituting it for half of my all-purpose flour in all my baking since learning of its heart-healthy benefits.

Baking should be fun – don’t be afraid to get creative and use what you have on hand. Can’t find barley flour in your supermarket and have no whole wheat flour, just use all-purpose flour in its place. No plain yogurt?  Any berry flavour, lemon or vanilla works great too.  Orange rind can easily lemon rind.  The one cup of berries can be any combination of fresh or frozen you like – try raspberries or blueberries. Play with the flavours and create your own favourite version!

Storage:

Can be stored in a covered container for 2 to 3 days or frozen for up to 3 months. If the kids are home or company drops by, you likely won’t have to worry about that though…