Sandi’s Salsa

Garden tomatoes are ripening and soon the saucy scent of simmering salsa will be wafting from my kitchen. For those of you who’ve asked, here’s the recipe!

Salsa was my very first venture into canning. The initial result was decent, but my husband said, “It’s good, but not as good as Donald’s.”

Donald was a teammate in rec hockey. When it was snack night, the other players always counted on Donald bringing his salsa. One fall, I asked if would share his recipe. He didn’t really have one, but gave me some direction, “Blanche and peel tomatoes until the pot is full.” Okay, how big a pot? “5 quarts, I think.”

He offered some rough guesstimates on the amount of peppers, onion and celery, and said he’d often add some oregano and basil. My garden herbs are usually past their prime by the time I make salsa and I found it didn’t really make a difference, so I omit them.

I did my best to follow his guidance, added more peppers and onions to get the ratio I preferred, and this is the result.

You can do the same thing here. Adjust the recipe to your taste, or what you have on hand, and make it your own!

I know this is a lot of chopping, and yes, you can use a food processor if your really want, but it’s not what I recommend. I prefer to have the veggies more intact in my salsa. Chop according to the size and consistency you prefer.

It does take time, but if you put on a good playlist or podcast, pour a beverage of choice and/or enlist someone to help, the time goes by fast. And trust me, the results are worth it!

This recipe has received rave reviews from friends and family. It’s made its way into many care packages and is often a gift when we’re invited out to dinner. One set of friends actually hides it when their adult kids come over to visit so they don’t have to share!

It’s been called, “The best salsa ever!”, but I’m not sure about that. I think I must be a missing secret ingredient, because I never did manage to get quite as good as Donald’s!

Main Ingredients:

  • 12 cups peeled & chopped fresh tomatoes
  • 2 tablespoons pickling salt
  • 4 cups chopped onions
  • 2 cups chopped celery
  • 4 cups chopped peppers (8 to 12 seeded & chopped jalapeno peppers plus enough green, red or yellow peppers to make 4 cups in total)
  • 3 cloves garlic, chopped finely
  • 1 1/2 cups pickling vinegar
  • 1 — 156 ml can tomato paste
  • 1/2 tsp cayenne pepper
  • 1 tsp red pepper flakes

Directions:

Set a standard, 5-quart, colander in a large bowl. Peel and chop tomatoes until colander is heaping full (about 12 cups). Sprinkle with 2 tbsp pickling salt and set aside to drain while you prepare your other vegetables.

Chop onions, celery, peppers and garlic. Check the colander of tomatoes, if there’s a large amount of juice in the bowl, remove 1 to 1 1/2 cups and set aside. (See note below.*)

Combine chopped tomatoes, remaining juice, celery, onions, spices and vinegar in a 5-quart dutch oven or large saucepan. Bring to a boil, then simmer for 45 minutes.

Add chopped peppers and garlic. Simmer another 20 to 30 minutes. Add tomato paste to thicken. Stir well and simmer another 5 to 10 minutes. Pour into sterilized jars and process in hot water bath for 15 minutes. Set on a cooling rack for 24 hours.

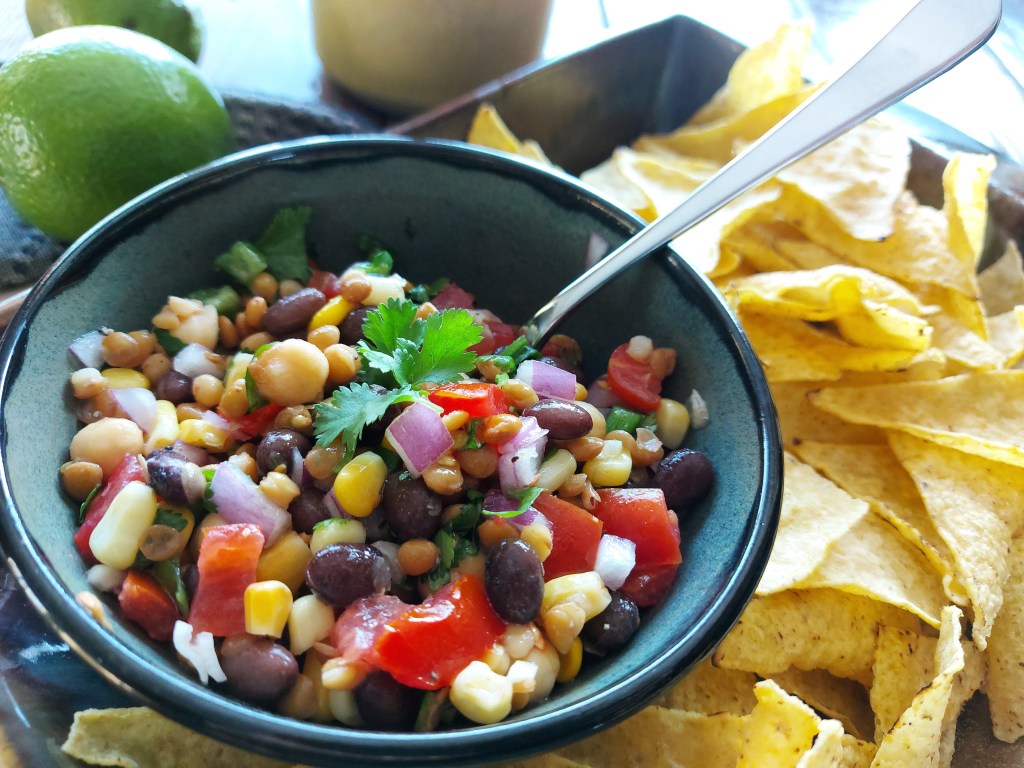
Enjoy with your favourite corn chips, on tacos, nachos, burgers, baked potatoes, in omelettes or soups — wherever you want a bit of zip and a taste of summer from the garden!


*Note: The amount of liquid will depend on the the variety of tomatoes you’re using. If you’re using all roma tomatoes (they are fleshier with less juice) this likely isn’t necessary, but I use a mix of varieties from my garden. Setting the excess juice aside prevents a watery salsa and reduces boiling time. You can always add more back in at the end to get your desired consistency. I freeze the leftover juice to add to soups in the winter.

Canadian Cowboy Caviar

What the heck is Cowboy Caviar? I’d never heard of it before stopping for take-out from one of our favourite restaurants, Farmhouse 50 in Minnedosa, Manitoba.

I was picking up their fabulous pizza and wings special when I spied “Cowboy Caviar” in their Grab ‘n Go section. Intrigued, I thought, “Why not? Let’s give it a try!” This innocent looking bean-veggie-salsa-combo was AMAZING and devoured by our family in no time flat.

And then, I couldn’t stop thinking about it! But, with the restaurant an hour and a half away, it wasn’t possible to just pop back for more. So the next day, I started experimenting. Once I came up with a combination of ingredients and a dressing that was a hit with the family, I asked a few friends to recipe test for me. The reviews were great with one suggestion to add the zest from the lime. Genius! Thank you Ellen Pruden!

With a little research I found out Cowboy Caviar, originally named Texas Caviar, was created in the 1940s by Helen Corbitt, an accomplished and formidable Home Economist, teacher, chef and cookbook author. She made the dish, after a request to serve a dinner with Texas-only products, using black-eyed peas, garlic, onion, vinegar and oil. When you search ‘cowboy caviar’ today, there are over 3,000,000 results. Reading about Ms. Corbitt, I’m not sure how she would feel about the evolution and popularity of her creation.

You’ll find no black-eyed peas in this recipe. It uses Canadian-grown pulses — lentils, black beans and chickpeas, and of course, Canadian canola oil.

Feel free to put your own spin on this recipe. Don’t like chickpeas? Replace the amount with more lentils or black beans. Hate cilantro? Use parsley. Not sure about the garlic? Try it without. Don’t have fresh tomatoes? Drain and chop canned tomatoes.

Just so you know this recipe makes 12 cups. Yes, it seems like a lot, but it’s addictive. And versatile. And delicious.

I love it as a salsa with tortilla chips, but it’s also fabulous on its own a side salad, or a snack to avert becoming hangry. Toss it with greens or pasta. Use it in omelettes or quesadillas. Get creative!

And if you really can’t see yourself using 12 cups, share away! Who wouldn’t want a surprise delivery of this tasty, satisfying snack with a bag of tortilla chips delivered to their door?

Canadian Cowboy Caviar

Main Ingredients:

  • 1 — 540 ml (19 oz) can black beans, drained and rinsed
  • 1 — 540 ml (19 oz) can chickpeas, drained and rinsed
  • 1 — 540 ml (19 oz) can lentils, drained and rinsed
  • 2 cups sweet corn, frozen & thawed, or canned
  • 2 medium tomatoes, finely chopped (about 2 cups)
  • 1 medium red onion, finely chopped (about 1 ½ cups)
  • 1 – 2 jalapeno peppers, finely chopped or ¼ cup finely chopped bell peppers (any colour)
  • 1 – 2 cloves garlic, finely chopped
  • 1 cup cilantro or parsley, finely chopped

Dressing:

  • 1/3 cup canola oil
  • 3 tbsp lime juice (1 — 2 limes)
  • zest from lime(s)
  • 3 tbsp apple cider vinegar
  • 1 tbsp white sugar
  • ½ tsp salt
  • ½ tsp pepper

Directions:

*Chop garlic and set aside.

Drain and rinse black beans, chickpeas and lentils. Put in large bowl. Add corn. Chop tomatoes, red onion, peppers and cilantro. Toss all ingredients together, including garlic.

In a small bowl, whisk together dressing. Pour over top of ingredients, and mix.

Makes 12 cups. Serve immediately or store covered in the fridge.

Serving Options:

  • Appetizer with tortilla chips
  • Side Dish
  • Salad topping on your choice of greens
  • Omelette filling
  • Quesadilla filling
  • Perfect with pasta, hot or cold

*Pro-tip for garlic from Professional Home Economist Mairlyn Smith – “For its antioxidants to become more bio-available, garlic needs to oxidize before it is added to a recipe. By letting it sit there “breathing” the oxidation can take place.”

Easy Cheesy Baked Cauliflower

Currently cauliflower is abundant, affordable and fresh from the field thanks to our amazing local vegetable producers! A friend gave me this recipe years ago and it has since become a family favourite.  A perfect dish for potlucks as it can be put together a day ahead and kept in the fridge until ready to bake.  

Easy Cheesy Baked Cauliflower

Ingredients:

  • 1 whole cauliflower
  • 3/4 cup mayonnaise
  • 1/2 cup sour cream or plain yogurt
  • 1 tbsp chopped dill
  • 1/8 – 1/4 tsp cayenne pepper
  • 1 cup shredded cheese

Directions:

Preheat oven to 375 F.

Leave cauliflower whole or cut into large pieces. Set into large pot with an inch or two of water and steam for 20 minutes.  Drain & let cool slightly.

Place cauliflower in greased 9″ X 13″ baking dish.  Blend mayonnaise, sour cream or yogurt, shredded cheese, dill & cayenne pepper.  Spread evenly over cauliflower.  Bake 15—20  minutes until bubbly and brown.


Maple Quinoa Salad

With spring’s arrival the desire for quick and easy make-ahead meals increases. This whole-grain quinoa salad fits the bill, plus it incorporates one of my favourite flavours — maple! 

I use locally grown “Prairie Quinoa” along with Manitoba maple syrup produced in our area.  An excellent salad to add to your meal-prep repertoire!  

Maple Quinoa Salad

Main Ingredients:

  • 1 cup quinoa
  • 2 cups water
  • 1 tbsp maple syrup
  • 1 red pepper, diced
  • 6 -8 green onions, chopped
  • 1 cup kernel corn (frozen or canned)
  • 1 cup canned black beans, rinsed and drained
  • 1/2 cup pecans, walnuts or almonds, chopped

Vinaigrette:

  • 1/4 cup apple cider vinegar
  • 3 tbsp canola oil
  • 2 tbsp pure maple syrup

Directions:

Place water, quinoa and 1 tbsp maple syrup in medium saucepan and bring to a boil.  Stir, cover pot, reduce heat and simmer for 15—20 minutes until cooked through.  Remove the saucepan from heat, fluff quinoa with a fork and let sit 5 —10 minutes.  Cool completely and transfer to a serving bowl.

While quinoa is cooling prepare peppers, green onions, corn, black beans and nuts.  Whisk together apple cider vinegar, canola oil and maple syrup.

Add veggies, beans, nuts and vinaigrette to cooled quinoa. Toss well and refrigerate until ready to serve.

Roasted Sweet Potato & Garlic Hummus

I’ll admit, the first time I tried hummus I wasn’t impressed.  It very dry, over-powered with garlic and rather unpalatable — not a recipe I felt obliged to try! But after sampling a few store bought varieties  — roasted red pepper, caramelized onion — I thought maybe hummus wasn’t so bad after all.  Then I found a recipe for Sweet Potato Hummus at Alaska from Scratch  which converted me to the ‘pulse side’ of snacking!  I adapted it to use heart-healthy canola oil and incorporated a few great tips from a Roasted Butternut Squash Hummus recipe at Nita at Carrots & Cake. The result — a family favourite, kid-approved, delicious, addictive, smooth and creamy hummus! 

Roasted Sweet Potato & Garlic Hummus

Main Ingredients:

  • 1 medium sweet potato (approx 1 lb or 500 grams), drizzle of canola oil
  • 1 – 19 oz (540 ml) can chickpeas, drained & rinsed
  • 3 cloves *roasted garlic or 1 raw garlic clove
  • 1/2 cup canola oil
  • 1 lemon, juiced (about 3 tbsp)
  • 1/4 cup hemp hearts (optional)

Spice Mixture:

  • 1 tsp paprika
  • 1 tsp cumin
  • 1/4 tsp cinnamon
  • 1/8 tsp cayenne pepper
  • pinch of nutmeg

Garnish options:

  • Parsley
  • Green onions
  • Hemp hearts
  • Roasted chickpeas
  • Grated or ground nutmeg
  • Paprika
  • Cayenne Pepper
  • Cinnamon
  • Lemon rind

Directions:

  1. Preheat oven to 400 F.
  2. Scrub the sweet potato & dry thoroughly. Pierce the skin 2-3 times with a knife or fork and lightly coat with a drizzle of canola oil.
  3. Place on baking sheet lined with parchment paper. Bake 45 min — 1 hour, until tender.  (If you cut sweet potato in half, reduce time to ~ 30 minutes)
  4. Let cool, peel off skin, cut off any dark spots and cut into 4 —5 cm pieces.
  5. *If roasting garlic, toss cloves with a bit of canola oil, wrap in foil & place on baking sheet with the sweet potato. Garlic will take less time to roast so remove from oven after about 30 minutes.
  6. Drain & thoroughly rinse chickpeas.
  7. Toss chickpeas, sweet potato, garlic, canola oil, lemon juice, hemp hearts (if desired) & spice mixture into blender or food processor
  8. . Blend well, scraping down as needed. If it isn’t as smooth & creamy as you’d like, add more canola oil (or water), a tablespoon at a time, until it reaches desired consistency.

To serve, drizzle with canola oil and top with your choice of garnishes. Serve with crackers & raw veggies. This also makes a wonderful spread for sandwiches or wraps. Basically this hummus is so good, you will get very creative in finding ways to use it, other than just eating it ‘straight-up’ with a spoon — which, by the way, is totally acceptable!

Notes:

  • Roasted garlic is sweeter & less overpowering than raw garlic, hence only use 1 clove if opting for raw.  My family loves it either way!
  • Hemp hearts will add a nutty flavour & slightly change the consistency of the hummus, but they also add protein, fibre & healthy fats.
  • Encourage creativity in the kitchen by letting the kids help. They love to personalize their snack by choosing their own garnishes, crackers & veggies.

Storage:

Store in an airtight container in the refrigerator for 3 -5 days, if it lasts that long…

Pumpkin Oatmeal Muffins

If you are looking for a hearty, healthy, flavourful, pumpkin muffin recipe — this is it!  Perfect for breakfast, snacks and dessert too! These muffins are family favourite and always a welcome addition to university care packages.

 Adapted from a recipe found on food.com several years ago. 

Pumpkin Oatmeal Muffins

2016-10-14-13-18-00

Ingredients:

  • 1/3 cup canola oil
  • 1/2 cup sugar
  • 2 eggs, beaten
  • 1 – 398 ml can of pumpkin puree (1 2/3 cup)
  • 1/3 cup milk
  • 3/4 cup all-purpose flour
  • 1/2 cup whole barley flour or whole wheat flour
  • 1 cup quick-cooking oats
  • 1 tsp baking powder
  • 1/2 tsp baking soda
  • 1/2 tsp salt
  • 1 tsp cinnamon
  • 1/2 tsp nutmeg
  • 1/4 tsp ginger
  • 1/3  cup mini-chocolate chips

Directions:

  1.   Pre-heat oven to 375°F (190ºC)
  2.   Grease or line a 12-cup muffin tin with large parchment baking cups.
  3.   Whisk together canola oil, sugar and eggs.
  4.    Fold in pumpkin puree and milk; mix thoroughly.
  5.   In separate large bowl, combine flours, oats, baking powder, baking soda,     salt, spices and mini-chocolate chips. 
  6.   Pour wet ingredients into dry ingredients, stir just to combine.
  7.   Using an ice cream scoop or large spoon, scoop the mixture evenly into    the muffin liners.
  8.   Bake for 20 – 25 minutes, until toothpick or cake tester inserted into the     center of a muffin comes out clean.
  9.   Set tins on cooling rack for 5 min. before removing muffins to cool    completely.

Notes:

  • Be sure to use pure pumpkin puree, not canned pumpkin pie.
  • Check out the amazing health benefits of barley flour here.
  • Don’t have any  barley or whole wheat flour? Substitute with all-purpose flour.
  • Feel free to switch out the mini-chocolate chips with raisins or nuts.

Storage:

Can be stored in a covered container for 2 to 3 days or frozen for up to 3 months. If the kids are home or company drops by, you likely won’t have to worry about that though…

Eggless Double-Chocolate Zucchini Cake

Short on eggs and long on zucchini? This cake is for you! It’s that time of year when either your garden, or your neighbour’s,  is overflowing with this popular, prolific squash.  My family loves this moist, delicious, easy-to-make cake.  After all, who doesn’t like turning a vegetable into chocolate? Sounds like a super-power to me! 

Eggless Double-Chocolate Zucchini Cake

2016-08-05 14.34.44

Ingredients:

  • 1/3 cup canola oil
  • 1 1/2 cups sugar
  • 3/4 cup buttermilk *
  • 2 cups grated zucchini
  • 1 tsp vanilla
  • 2 1/2 cups flour
  • 4 tbsp natural cocoa powder
  • 1 tsp baking soda
  • 1/2 tsp baking powder
  • 1/2 tsp cinnamon
  • 1/2 cup dark chocolate chips

Directions:

  1.    Preheat oven to 350°F (180°C).
  2.    Grease 9 X 13 pan or line with parchment paper.
  3.    In large bowl, mix canola oil and sugar.
  4.    Add milk, grated zucchini and vanilla. Stir well.
  5.    In separate bowl, combine dry ingredients and chocolate chips.
  6.    Add to zucchini mixture.  Batter will be thick.
  7.    Spread evenly in pan. Bake 25 – 35 minutes, until toothpick or cake tester inserted in the middle comes out clean.
  8.   Let cool completely before serving.

Storage:

Can be kept in a covered container for 2 to 3 days or frozen for up to 3 months.

Notes:

*Buttermilk substitute – add 1 tbsp vinegar to milk (at least 1% milk fat).

Want to preserve excess squash for later use? Simply measure out desired amount of grated zucchini (2 cups for this recipe), pack in freezer bags, date and label. Keep in the freezer for up to 6 months.


Three-Grain, Berry-Amazing Muffins

When strawberry and saskatoon season collide, your favourite muffins get a make-over! 

Three-Grain, Berry-Amazing Muffins

Muffins & Berries

Ingredients:

  • 1 cup quick-cooking oats
  • 1/2 cup barley flour
  • 1/2 cup whole wheat flour
  • 1 tsp baking powder
  • 1/2 tsp baking soda
  • 1/2 tsp salt
  • 1/2 tsp cinnamon
  • 1 large egg
  • 1 cup yogurt, plain
  • 3/4 cup brown sugar, packed
  • 1/3 cup canola oil
  • 1 tbsp finely grated lemon rind
  • 1/2 cup strawberries, diced
  • 1/2 cup Saskatoon berries 
  • 1 tbsp flour

Directions:

  1.   Pre-heat oven to 375°F (190ºC)
  2.   Lightly grease or line a 12-cup muffin tin with large paper liners.
  3.   Thoroughly mix oats, flours, baking soda, baking powder, salt and                      cinnamon in a large bowl.
  4.   In separate bowl, whisk together egg, yogurt, brown sugar, canola oil and     lemon rind.
  5.   In small bowl, coat berries evenly with flour.
  6.   Pour wet ingredients into dry ingredients, stir just to combine. Gently  fold in berries.
  7.   Using an ice cream scoop or large spoon, scoop the mixture evenly into    the muffin liners.
  8.   Sprinkle tops with oat or barley flakes.
  9.   Bake for 20 – 25 minutes, until toothpick or cake tester inserted into the     center of a muffin comes out clean. Muffins should be golden brown.
  10.   Set tins on cooling rack for 5 min. before removing muffins to cool        completely. Although, you may want to sample one while slightly warm…

Notes:

I love barley flour and have been substituting it for half of my all-purpose flour in all my baking since learning of its heart-healthy benefits.

Baking should be fun – don’t be afraid to get creative and use what you have on hand. Can’t find barley flour in your supermarket and have no whole wheat flour, just use all-purpose flour in its place. No plain yogurt?  Any berry flavour, lemon or vanilla works great too.  Orange rind can easily lemon rind.  The one cup of berries can be any combination of fresh or frozen you like – try raspberries or blueberries. Play with the flavours and create your own favourite version!

Storage:

Can be stored in a covered container for 2 to 3 days or frozen for up to 3 months. If the kids are home or company drops by, you likely won’t have to worry about that though…

Southwest Fiesta Chicken Soup

On a cold, windy winter day, one of my favourite things to make is a hearty pot of soup.  It is so versatile. There are no hard and fast rules – anything goes.  Start with a good base, use what you have on hand ~ be creative! 

This morning I planned on making my classic chicken and rice soup, but half a cabbage in my fridge was awaiting transformation. This led to an unintentional shift in direction.

I began with my usual chicken soup base of onion, celery and carrot and added the lonely, left-over the cabbage. The mixture was too pale for my liking so I added a jar of salsa. There was a cup of green peppers from the garden still in the freezer, so in they went. Corn added a touch of yellow and considering  it is the International Year of Pulses, a can of black of beans seemed in order.  

Suddenly my chicken soup had a ‘southwest fiesta’ zip to it – not what I intended, but the results were delicious!  A colourful, fabulous warm-you-right-up, meal-in-a-bowl. Carbohydrates ✓  Protein ✓   Fibre ✓  Veggies ✓  Lunches for the week ahead  ✓                Flavourful ✓✓✓

Give it a try!  Measurements are not set in stone, but I like at least half my pot to filled with veggies.  Always aim for Half Your Plate!  Feel free to adjust amounts to your taste.  


Southwest Fiesta Chicken Soup

P1140378

Ingredients:

  •   2–4 cloves of garlic
  •  1 large onion
  •  ¼ – ½  head of cabbage
  •  4–6 carrots
  •  2–4 stalks of celery
  •  2 tbsp canola oil
  • salt & pepper to taste
  •  2/3 cup wild rice
  •  900 ml chicken stock
  •  418 ml jar of salsa (mild, medium or hot)
  • 1 ½ cups frozen corn
  •  1 green pepper, chopped
  •  4 + cups of water, to desired thickness
  •  540 ml can black beans
  •  2 – 4 cooked chicken breasts

Garnish options:

  • Crushed corn chips
  • Shredded Cheese
  • Sliced green onions

Directions:

  1. Finely chop garlic and set aside.*
  2. Dice onions, cabbage, carrots and celery.
  3. In Dutch Oven or stock pot, warm canola oil over medium heat.
  4. Throw in diced veggies, season with salt and pepper and sauté for                about  10 minutes or until softened.
  5. Toss in garlic, sauté additional 1–2 minutes.
  6. Add rice, chicken stock, salsa, corn, green pepper and water.
  7. Cover the pot, bring to a boil. Reduce heat and simmer for 30–45 minutes.
  8. Drain and rinse beans, dice chicken. Stir into soup . Warm thoroughly.
  9. Serve as is or garnish with corn chips, shredded cheese & green onion.

Note:

*Pro-tip  for garlic from Professional Home Economist Mairlyn Smith – “For its antioxidants to become more bioavailable, garlic needs to oxidize before it is added to a recipe. By letting it sit there “breathing” the oxidation can take place.”


Happiness in a Cookie

This oatmeal chocolate chip cookie recipe always gets rave reviews — a favourite amongst family and friends for many years.  It is the cornerstone of care packages for my now grown children and always made when they come home to visit.  The aroma and melt-in-your-mouth goodness of this fresh-baked cookie is delectable! 

(Adapted from a Cranberry-Oat Cookie recipe in a 2001 Robin Hood Baking Festival booklet.)   

Happiness in a Cookie

P1070882

Ingredients:

  • ¾ cup butter, softened
  • 1 cup packed brown sugar
  • ¼ cup granulated sugar
  • 1 egg
  • 2 tbsp water
  • 1 tsp vanilla
  • 2/3 cup flour (I like to use 1/3 barley flour & 1/3 all purpose flour)
  • ¾ tsp baking soda
  • ¼ tsp cinnamon
  • 2 ¾  cups quick-cooking oats
  • 2/3 cup chocolate chips

Directions:

  1.  Pre-heat oven to 350°F (180ºC)
  2.  Beat or cream together butter, sugars, egg, water and vanilla until very smooth.
  3.  Add flour, baking soda, and cinnamon to creamed mixture, blending well.
  4.  Stir in oats and chocolate chips.  (dough will be slightly sticky)
  5.  Using a 1 tablespoon cookie scoop, drop dough onto baking sheets.
  6.   Bake for 12-15 minutes, until edges are golden-brown. Do not over bake.
  7.  Let sit on baking sheets for 2 -3  min. before removing to cool.

Notes:

I  normally use 1/3 cup semi-sweet and 1/3 cup dark chocolate chips but sometimes substitute 2/3 cup mini M&Ms or Reese’s Pieces.  If you don’t like chocolate (seriously???) use any combination of raisins, cranberries, walnuts, pecans or coconut.

Mini Reese's Pieces ~ Perfect for Halloween!

Mini Reese’s Pieces ~ Perfect for Halloween!

Storage:

What isn’t eaten immediately, can be stored in a resealable container on the counter for 1 -2 days or in the freezer for up to a month.  Generally they disappear pretty quick…